![]()
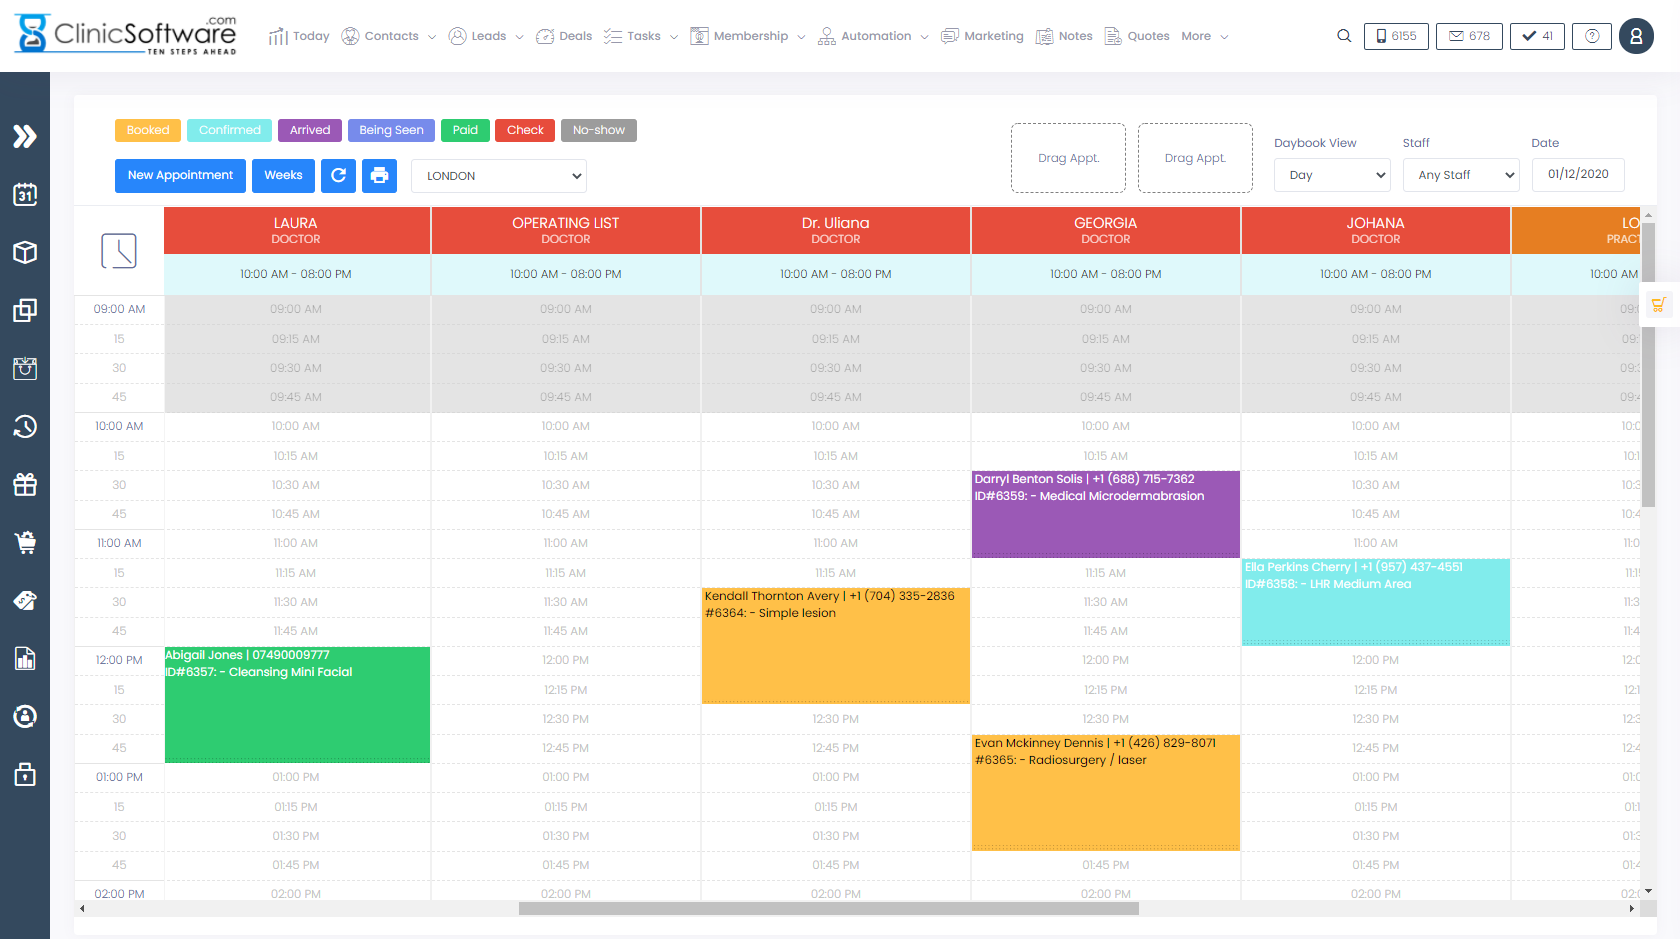
The Day Book is the page from which you manage your appointments and waiting list.
You can access the Day Book page from the “DAY BOOK” button on the left menu (see above icon).
Layout:
The Day Book is divided into 4 sections:
- Top section for date navigation, location selection, waiting list and appointment type legend
- Staff columns (horizontal) with a button to scroll to the current time (left clock icon)
- Time section (vertical)
- Appointments section
The appointments section can be scrolled both horizontally and vertically.
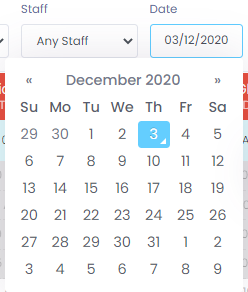
Date navigation
You can select the day you wish to view your appointments in multiple ways:
- Selecting the day directly from the date calendar.
- Using the week day navigation located in the top section of the page.
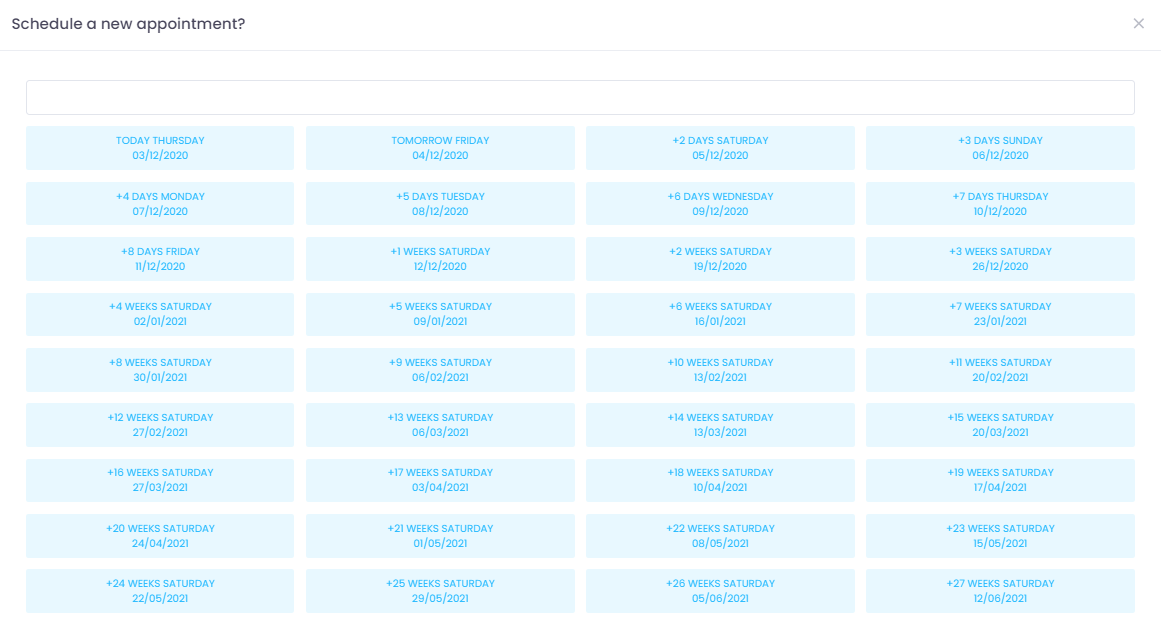
- Using the “Weeks” button to select 1-7 days or 1-12 weeks in the future.
To select the day from the date calendar click on the “View bookings from” field and then select the date.
The weekday navigation is located on the top section of the page.
You can select the weekday directly as illustrated below:
You can also use the next “>>” and previous “<<” buttons to change the day:
The weekday navigation will automatically get the start and end of the week that corresponds to the selected day in the Day Book.
For Example, if the current day is 25th of August and the selected day inside the Day Book is 3rd of September (Saturday) then when you press the Monday button it will take you to the 29th of August.
The “Weeks” button is located on the top section of the page.

Upon pressing it will open a window from which you can select the days or weeks in advance of the current selected day.
To reload the bookings to check if there are new appointments (e.g. added from the online booking) use the “Check” button located in the top section of the page.
![]()
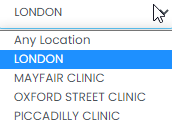
Location change
If you have multiple branches you can change the location at which you manage the appointments by using the location drop box located in the top section of the page.
The Staff List
The staff is displayed in a horizontal list below the main date and location controls.

If you click on the staff name a window will open containing a list of all of the selected staff’s appointments.
From this window, you can also see the staff contact details and notify them by Email and SMS.
Appointments that are too small in duration (e.g. 5 minutes or lower) can also be easily accessed from this window.

Staff notifications
To notify the staff, click on the staff name from the Day Book and then press the “NOTIFY STAFF” button.
A window will open allowing you to send out Email and SMS notifications.
![]()
Current time
To scroll the Day Book to the current time click on the clock icon located before the staff list.

The Day Book will scroll to the current time indicated by the red dotted line.
Appointment statuses
There are 5 statues that an appointment may have:
- Booked (yellow colour)
- Confirmed (blue colour)
- Arrived (violet colour)
- Paid (green colour)
- Check (red colour)
The default status of an appointment when added through the Day Book is “Booked”.
When you update the client status to “Arrived” the system if configured will send notifications to the staff informing of the client loyalty category if set.
On the arrived status, if configured the salon waiter will also receive an email containing the beverages specified in the appointment “Drinks” option.
Notifications are also sent on the other types of status if configured the client and/or the staff can be notified if the appointment is rescheduled, resized, its treatment lists are changed or if it has been cancelled.
When the appointment status is changed to “Paid” or “Paid on the same day as the appointment” if the appointment is of services type the system will automatically add the appointment’s services into the cart and redirect you to a page from which you take the payment by pressing the CASH / CARD buttons.
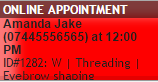
The “Check “status is the default status for appointments booked through the online booking page.
Appointment types
There are 3 types of appointments that you can book from within the Day Book:
- Services type appointments
- Courses type appointments (sessions based and minutes based courses)
- Patch Tests type appointments
Each appointment type contains only items of its type (services, courses, patch test).
The services type appointment also can contain Groupon codes.
Appointments booked through the online booking page will also feature an “ONLINE APPOINTMENT” header for identification.